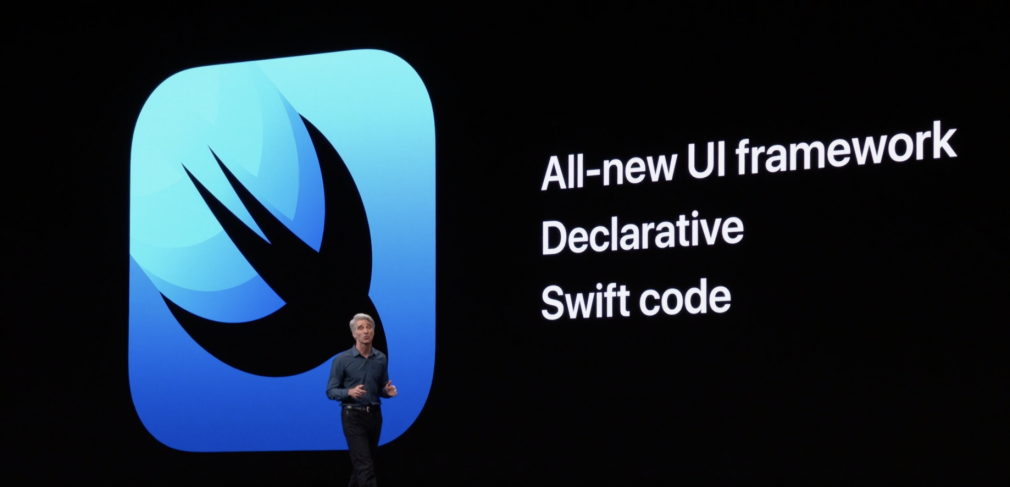
One of the most exciting announcements at WWDC 19 was ‘SwiftUI’, something which we all wanted since some time.
Much like react native and flutter, SwiftUI introduces a declarative way of defining the UI elements, an approach which addresses many issues of Interface Builder and storyboards.
Cool Features in SwiftUI:
- My personal favorite is ‘Live Preview’. While using SwiftUI, you can live preview in parallel even the slightest changes you make in the app, without any need for re-compiling or re-running the whole application.
- To compare UI on multiple devices, live previews can be shown on all the devices using previewDevice. It can also be viewed on any custom frame size.
- Other than previewing each screen individually, you can also ‘live’ interact with the elements and see the navigation in action in previews. In short, you can check out all UI flows without even need to run the app on simulator or actual device.
- SwiftUI doesn’t mean you have to redo the tedious process of writing basic labels and textfields again and again. Any UI element can be added to the code by ‘drag and drop’ from the object library.
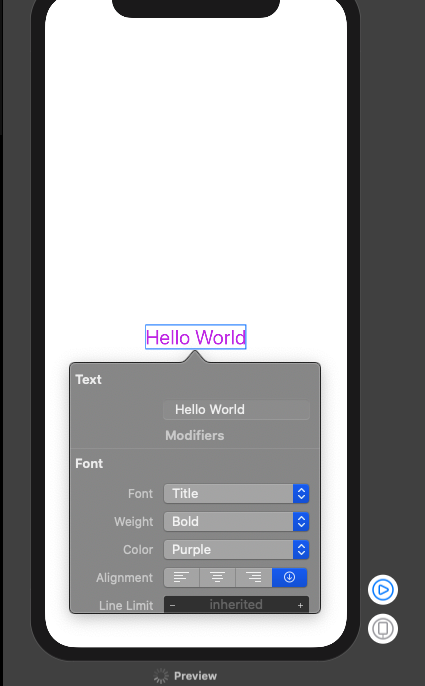
- You can also set an element’s attributes in preview. Just command + click on an element -> Inspect -> Change the attributes’ values.
Exploring SwiftUI:
So excited enough to begin your first SwiftUI Project? Let’s get started.
Make sure you have Xcode 11 Beta and your Mac is running macOS Catalina Beta to run SwiftUI.
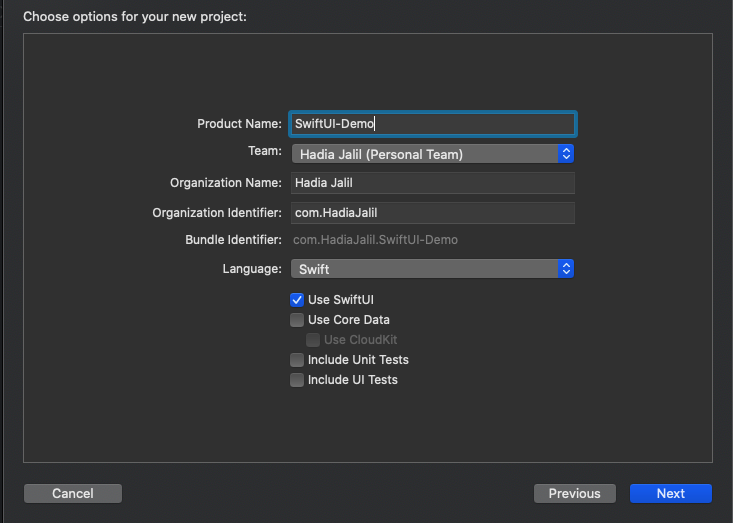
Go to Xcode, File -> New -> Project. Choose template as Single View App. Select Language as Swift and make sure ‘Use SwiftUI’ checkbox is ticked.
In the Project Navigator, you can see some new files. We have a new SceneDelegate.swift right after AppDelegate.swift. There are many delegate functions inside the file, but the most important thing is UIHostingController.
[cc lang = “swift” ] let window = UIWindow(frame: UIScreen.main.bounds)
window.rootViewController = UIHostingController(rootView: ContentView())
self.window = window
window.makeKeyAndVisible() [/cc]
UIHostingController is a ViewController which is used for SwiftUI Views. Soon, you will also see how SwiftUI Views are different from UIViews.
In above lines of code, we are setting the window’s rootViewController as instance of UIHostingController whose main view is ContentView. Let’s jump to the ContentView to explore our first SwiftUI View.
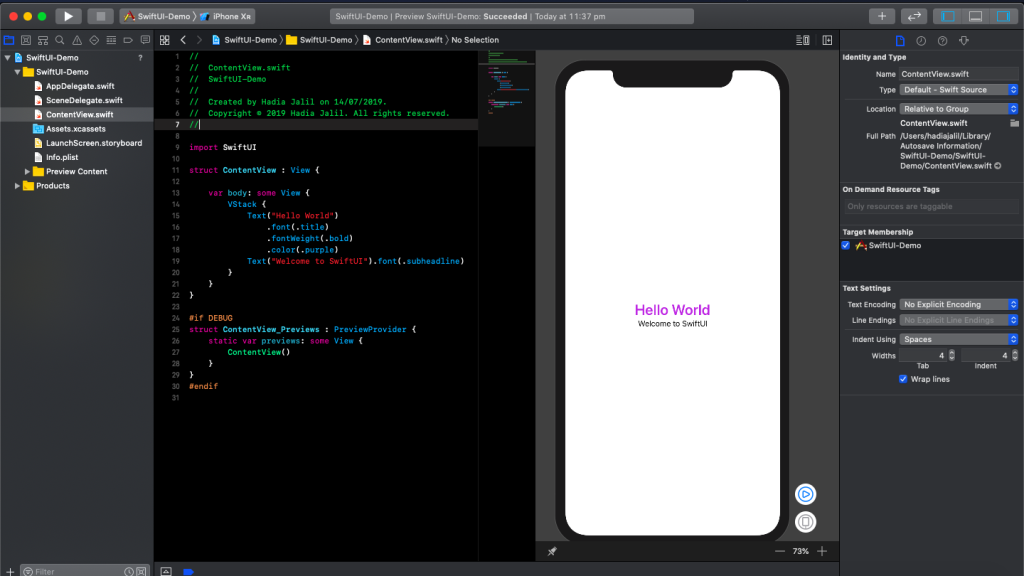
[cc lang = “swift” ] struct ContentView : View {
var body: some View {
Text(“Hello World”)
}
} [/cc]
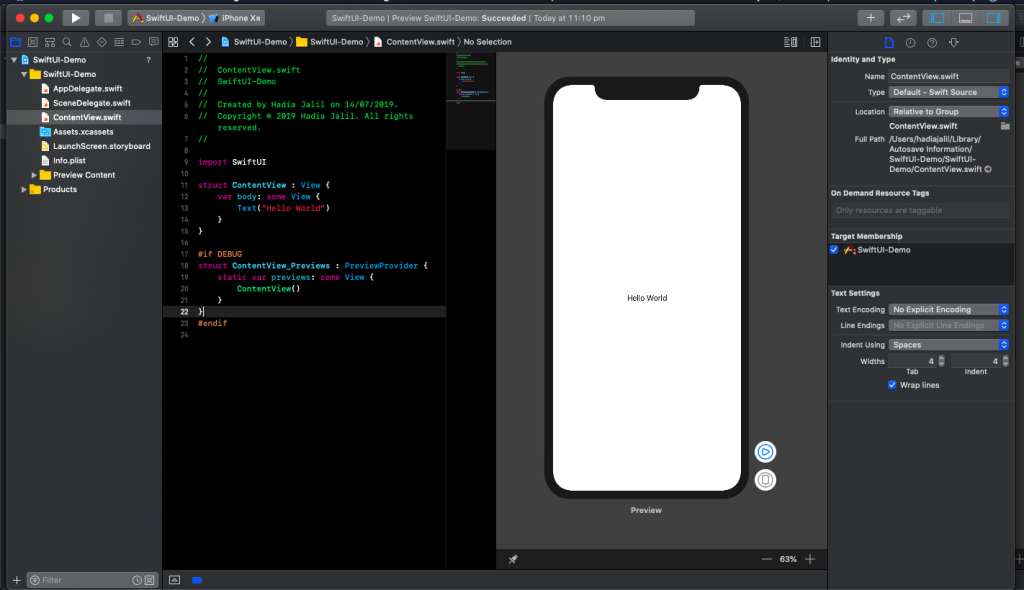
In above code, the body variable is representing the main content of the view. We have a Label (which is renamed as ‘Text’) with text ‘Hello World’ in the body. By default, it’s aligned centre in the superview’s frame. Let’s see the output in the ‘Live Preview’. If you can’t view the Canvas, go to Editor and make sure ‘Editor and Canvas’ is selected. If there is nothing on the canvas, check at the top, and press ‘Resume’.
![]()
If everything goes well, you can see a preview of the ContentView 🙂
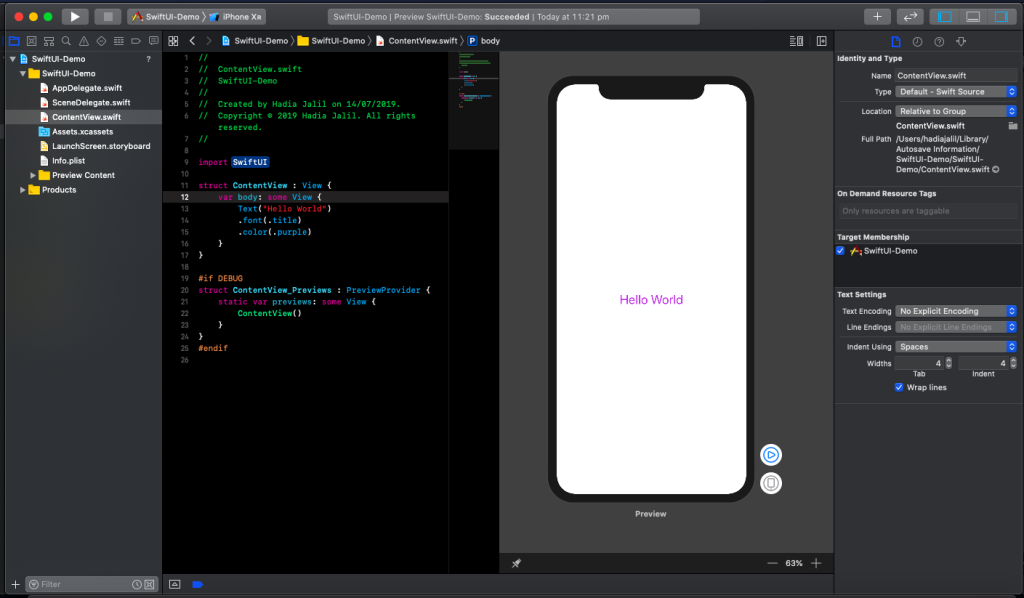
Let’s explore SwiftUI further. We want to increase the size of the label and also we want to give it a purple color. Change the contents of ContentView with following:
[cc lang = “swift” ]struct ContentView : View {
var body: some View {
Text(“Hello World”)
.font(.title)
.color(.purple)
}
} [/cc]
You can see the changes being depicted in the Preview.
Let’s now change the attributes via Canvas. Command-Click on the ‘Hello World’ Text element and it will show you a drop down having many options. Click ‘Inspect’ and you can see a list of attributes. Let’s change the ‘Weight’ to ‘Bold’ and see how both Preview and the code are changed accordingly. Completely synchronized.
It’s time to add another label in the ContentView.
The ‘body’ property can only return one view, i.e. one main view. Now, we need to embed our Text element in a VStack.
VStack and HStack in SwiftUI are identical to vertical and horizontal stacks views in UIKit. Although their functionality is little extended for SwiftUIs.
Command click on Text in the code, and choose ‘Embed in VStack’.
Now, click on the + button from the options at the top right of Xcode. Drag and drop a ‘Text’ right after the first Text Element. Change the text to ‘Welcome to SwiftUI’ and font to subheadline.
Summary:
So, In this tutorial we have covered the basics of SwiftUI. We discussed several cool features being introduced, and how to get started with building our first UI. In upcoming tutorials, we will cover more detailed topics like navigation, passing data via models and handling input variables. Stay tuned for more tutorials 🙂