
Alert Controllers are one of the great ways to present over current context, without the need to navigate back and forth between multiple controllers. They are excellent resources for confirmation, quick actions and user inputs. But despite this much usefulness, they have many constraints and limitations of its usage.
One of the elegant solution to the above problem can be the usage of a custom controller and presenting it just like an alert controller. Designing a custom view can, therefore, give you as much customization as you want. Let’s get started.
First of all, create a view controller in your storyboard and design it according to your functionality. Make sure to keep the UI design as close to Apple’s default alert controller’s as possible.
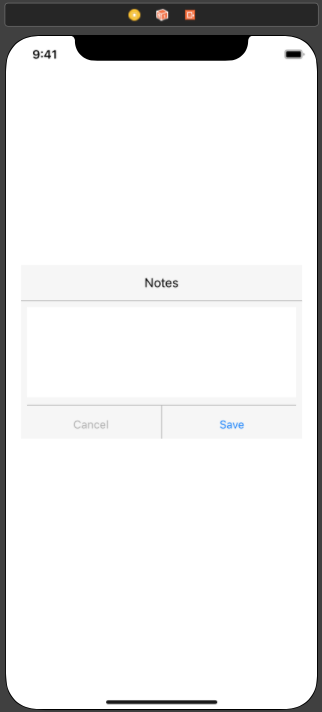
Here I created a simple view inside the view controller with one label, one textview and 2 buttons. Change the background color to #F4F4F4 to depict the Alert Controller’s UI.
Now go to the attributes inspector and change the transition style to ‘Cross Dissolve’ and presentation as ‘Over Current Context’.

Next, create the swift file for the view controller named NotesAlertController.swift. Create IBOutlets for all the above views, including the container view.
[cc lang = “swift” ] @IBOutlet weak var alertView: UIView!
@IBOutlet weak var notesLabel: UILabel!
@IBOutlet weak var notesTextView: UITextView!
@IBOutlet weak var cancelButton: UIButton!
@IBOutlet weak var saveButton: UIButton! [/cc]
In next step, to imitate the behaviour of Alert Controller, add these two lines in viewWillAppear().
[cc lang = “swift” ] alertView.layer.cornerRadius = 15
self.view.backgroundColor = UIColor.black.withAlphaComponent(0.4) [/cc]
This will set the corner radius of our container view as well as apply the fade effect on background view.
Also create the IBActions for save and cancel button.
[cc lang = “swift” ] @IBAction func cancelButtonPressed(_ sender: Any) {
notesTextView.resignFirstResponder()
self.dismiss(animated: true, completion: nil)
}
@IBAction func saveButtonPressed(_ sender: Any) {
notesTextView.resignFirstResponder()
self.dismiss(animated: true, completion: nil)
}
[/cc]
Any custom code for these two actions can be added here. You can also choose to omit the last line i.e. dismiss alert controller immediately (and dismiss at a later stage whenever required). Infact, one of the use cases of such a custom presented controller is to prevent the automatic dismissal of alert controller which is the default behaviour of UIAlertActions.
It’s time to present our alert. In storyboard, set the identifier of NotesAlertController as ‘notesController’ and add this code anywhere you want to present the alert.
[cc lang = “swift” ]
let notesAlert = UIStoryboard(name: “Main”, bundle: nil).instantiateViewController(withIdentifier: “notesController”) as? NotesAlertController
self.present(notesAlert, animated: true, completion: nil)
[/cc]
Looks cool. Build and run your app and you have a fully functional customized alert controller.
Plus, once designed, you can use this controller anywhere inside your app, hence reducing the effort to write same code multiple times. You can also use delegation to pass data from alert controller to your view controller.
It’s time to let your creativity begin and create engaging user flows involving minimum navigation. Don’t forget to give your feedback and share your amazing works in comments. 🙂