Have you ever felt inspired by Silicon Valley’s Jian-Yang and thought of making your own Hotdog app? No knowledge of Machine Learning? No issue at all. With Apple’s CreateML framework, you can amaze your friends in a matter of minutes.
Let’s get started.
Setting up the Project:
CreateML framework lets you train your own custom classifiers, with no to little knowledge of Machine Learning, on your Mac. All you have to do it to provide with samples of each category for training.
For this tutorial we’ll use Kaggle’s open source dataset for Hot Dog – Not Hot Dog. Just go ahead to this link and click on the download button at the top to download the dataset.
There are two folders inside the dataset, train and test. Inside each of them, you can find two folders describing two class labels, i.e. hot_dog and not_hot_dog.
Building the CoreML Model:
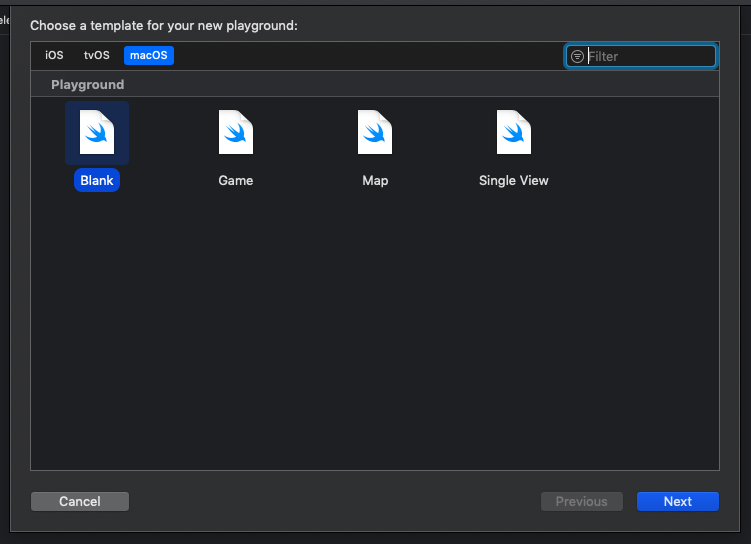
Now start XCode and create a blank macOS playground. Name it as HotdogPlayground.
Now replace the contents of the playground with following:
[cc lang = “swift” ]import CreateMLUI
let builder = MLImageClassifierBuilder()
builder.showInLiveView()
[/cc]
As for now, you can only build an image classifier in UI. Above code is quite straight forward. Just create a builder object and show it in live view. Run the playground and you will see a pretty cool Image Classifier Builder in Live view of playground.
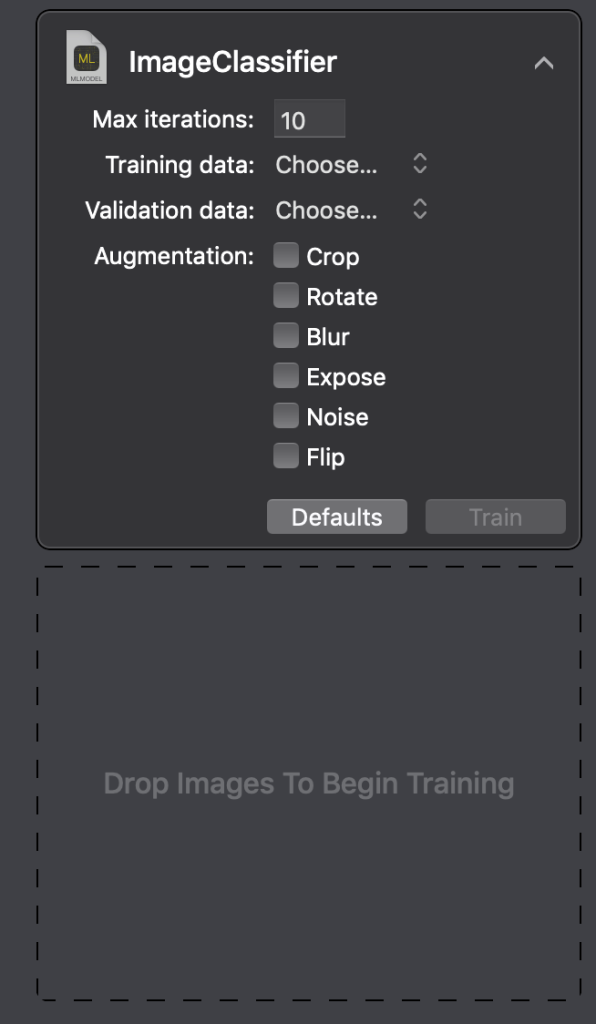
You can set multiple classifier parameters in UI. (If you can’t see these parameters, click on small arrow at top right). As for now, set them all to default. Drop the train folder from your downloaded dataset to the ‘Drop Images To Begin Training’ area. Now the model will start training on the basis of provided input.
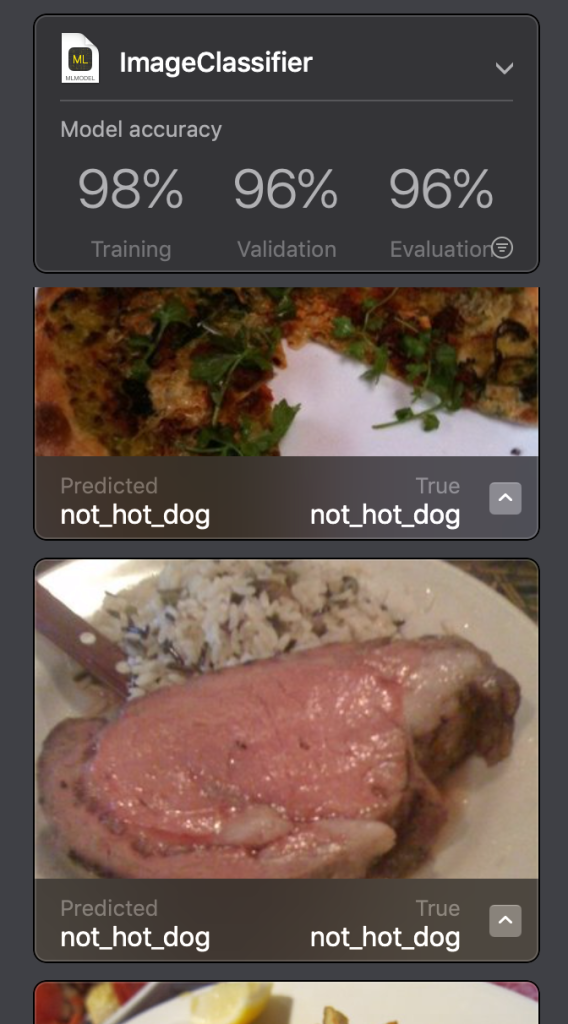
After it’s done with training, you will be provided with following UI, showing training and validation accuracy of the model.
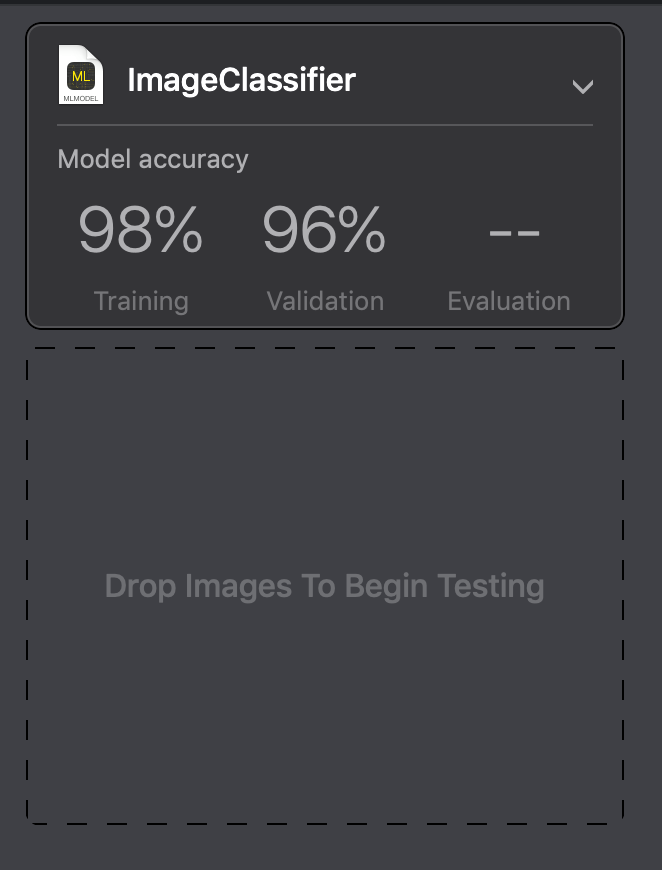
Looks Good. Let’s now test this trained model on the unseen data. It’s also as simple as training the model.
Drag the test folder from the downloaded dataset to ‘Drag Images to Begin Testing’ area. After testing is completed, we will get the evaluation accuracy along with all the testing images and their predicted and actual labels.
Saving the Model:
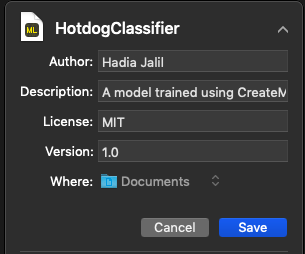
Let’s now customize the model name and metadata.
You can update the name of the model in the UI, as well as author, description, license and version info (by clicking on the small triangle at top right). Customize all parameters and hit ‘Save’.
The .mlmodel file is, now, saved in Documents folder.
Using the model:
Let’s make an app to use our recently compiled model.
To focus on CreateML, I’ve created a starter project. It includes main one-screen UI as well as the functionality for capturing images using camera. It also contains a helper function for converting an image to CVPixelBuffer. You can download it from here.
Build and run the app on a real device and you can see a minimal UI along with the option to capture Image. Right now, it just shows the image in an imageView. Let’s add the machine learning capabilities in our app.
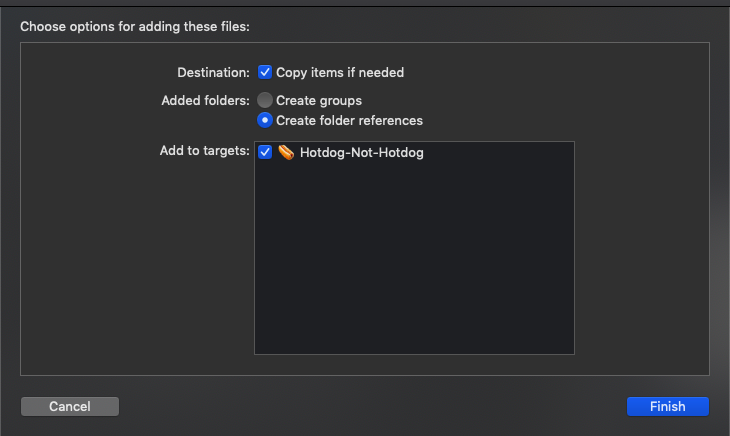
Drag and drop the .mlmodel file we created above into the project folder. Remember to check ‘Copy Item if needed’ and ‘Add to targets’ checkboxes.
Now open the .mlmodel file in XCode. Wait until a small arrow appears in front of the Model class. Click on that arrow and it will take you to the XCode generated model class. We will use this class for predictions. Now open ViewController.swift and add this line above viewDidLoad.
[cc lang = “swift” ]let model = HotdogClassifier()[/cc]
Now add this code at the end of imagePickerController(:didFinishPickingMediaWithInfo:)
[cc lang = “swift” ] //Get captured image
let userImage = info[UIImagePickerController.InfoKey.originalImage] as? UIImage
//Make prediction while converting image to CVPixelBuffer
guard let output = try? model.prediction(image: buffer(from: userImage!)!) else {
return
}
//Display predicted output
if output.classLabel == “hot_dog” {
hotdogLabel.text = “Hotdog!!! ?”
}
else if output.classLabel == “not_hot_dog” {
hotdogLabel.text = “Not Hotdog!!! ☹️”
}[/cc]
The above code takes UIImage object from user captured image, converts it into CVPixelBuffer, pass to XCode generated CoreML class and displays the output on the runtime. With just few lines of code, you have a fully functional customized prediction application. ?
Compile and run the application and feel free to play with random images.
Full project code is available here:
You can give any suggestions / feedbacks in comments below, or reach out to us at @the_swift_girl